The Budget Friendly Manicure - With these supplies and this effortless procedure many amazing and affordable manicures are guaranteed.
By Ashley Pinkham

All around the country, many women today spend up to $30 a week for a salon manicure. The question is why would you fall for this trap when with twenty dollars and these simple “do-it-yourself” steps you could create professional quality results and keep cash in your pocket? A one-time investment in the proper supplies, a little know how and some practice will last you an entire season of luxury manicures, in the comfort of your own home.
To get started, you will need the following supplies:
{ 2 - 4 hand towels
{ Soaking bowl (This can be a simple plastic kitchen bowl or an official manicure bowl.)
{ Hand soap
{ Non-acetone polish remover
{ Cotton balls
{ Nail clippers
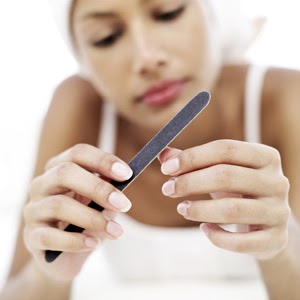
{ Nail file
{ Buffing block
{ Cuticle remover
{ Orangewood stick or cuticle pusher
{ Cuticle nippers* (These are optional and only recommended for those who know how to use them as they can be dangerous and cause harm to a first time user)
{ Sugar scrub
{ Lotion
{ Base coat polish
{ Nail color polish
{ Top coat polish
Usually a hard, flat surface like a kitchen table or desk will assure the best results, but anywhere you are comfortable and can keep a steady hand will work. Before beginning remove and safely store any hand jewelry you may be wearing. Fill the soaking bowl with warm water and your choice of hand soap. Depending on the season, pomegranate or sea breeze work great for warm months, while pumpkin or wintergreen can set the tone when it is cold outside. Place your soaking bowl and other manicure supplies on one of the towels. Now to set the spa mood, light some delicious candles, bump your favorite tunes, take a seat, and relax.

The key to a great manicure is in the prep work. First, using your non-acetone polish remover and a cotton ball, wipe off any old polish from each nail bed. Next, to clean and soften the skin, place both hands in the bowl of warm, sudsy water while relaxing to the next tune on your iPod (about 3-5 minutes). Afterwards dry both hands thoroughly with your second towel. Deciding on a comfortable and functional nail length is your next step. Generally, at least 1/8 inch is recommended. If your nails are too long use the clippers to clip your nails to the desired length, being careful not to catch the skin. Use discretion when deciding how short to clip your nails. If the nails are already too short, you may not need this particular step. Further refine the shape of each nail and remove any frayed edges with your nail file. When filing, use an outside to center technique. By working from the outside towards the center, the possibility of splitting the nail is rough of a surface. This is also the time to use a buffing block to remove any ridges in the nail bed. For each nail repeat the clipping, filing and buffing steps.

Once the cleaning and shaping are complete on both hands the pampering can begin. First, apply cuticle remover to the base of each nail and place both hands back into the soaking bowl for roughly 2 minutes. When you remove your hands this time, dry only slightly, enough to avoid dripping. Next, place a small piece of cotton around the tip of an orangewood stick or use your cuticle pusher and gently push back the cuticles on each nail. This should be done with a light touch so as not to cause damage or stunt cuticle growth. After, buff the nail again lightly to remove any loose cuticle remaining on the nail. At this point, if you choose to do so, you can carefully nip any excess cuticle that you did not remove with the last two steps. Now, it’s time for the fun part! Grab your scrumptious sugar scrub and apply it directly to your hands being sure to massage all the sore spots. After the kinks are worked out, rinse your hands back in the soaking bowl to remove all the excess sugar. (If available this can also be done by washing off in a kitchen or bathroom sink). After you have removed the sugar scrub and dried your hands, grab the most nourishing, succulent lotion you have around your home and massage your arms and hands up to the elbow. If you are looking for an additionally satisfying massage, enlist the help of your roommate, boyfriend, or husband to do the honors instead.

After you enjoy your massage, it is the time to be creative. Take another cotton ball saturated with nail polish remover and rub over each nail bed. This step is crucial to assuring the polish adheres to the nail surface, reducing the possibility of the polish chipping. If you have access to a nail dehydrator, you can lightly go over each nail to help that much more with the nail polish adhering to the nail for a longer period of time. It is now finally time to begin painting! Before moving to your ruby red or neon pink, be sure to be paint a thin layer of base coat on each nail. While it is tempting to skip over applying the base coat and move ahead, base coat is necessary to avoid discoloration of the nail. Allow the base coat and each subsequent coat of polish to dry for about 3 minutes (again about the length of the next song on your play list) before moving to the next. Proper polishing technique is to use a three stoke pattern to cover the nail bed. A generous middle stroke, followed by a quick touch up stroke to each side of the nail is the proper way to use this pattern. Using too many strokes will cause bubbles and dents in the polish. Also keep in mind if your nail polish is too thick it will be nearly impossible to make the polish look even and pretty. (Thicker polish can be thinned with polish thinner, available at a beauty supply store.) Apply a second layer of color and finally, your top coat of choice, each time allowing sufficient drying time and using the three stroke technique described above. To ensure your polish is completely dry, relax an additional 10-15 minutes before resuming normal activities. Not allowing sufficient drying time can cause dents and scuffs in the nail color, ruining your professional look and requiring repair, so be patient to secure long lasting results. (Tip: There are nail polish accelerators available at a beauty supply store that will ensure a quicker drying time.)
 By following these easy steps, you will obtain professional looking manicure results while saving money. Your beautiful hands are sure to be the envy of your next garden or book club meeting. Don’t spend that weekly bundle of cash at a fancy nail salon when you can imitate the feel and results in the comfort of your home for a fraction of the cost. You can even wear your PJ’s if you’d like. Soak, clip, file, cuticles, scrub, lotion, polish; it’s that easy. Spend your Friday night in this week, using this home remedy to increase your self-esteem. I promise, you'll find the soaking and massage are also great stress relievers. It’s so much for so little.
###
No comments:
Post a Comment